Jamkazam allows and encourages you to find strangers on the ‘net with whom to jam. But for your first time, you probably will feel more comfortable trying it with a friend you know. If your friend has a Jamkazam account, first add them to your Jamkazam friends list.
Adding Someone to Your Jamkazam Friend List
1. Launch and log into the Jamkazam client software. You should see the home screen:
2. In the upper right corner of the home page, click in the Search box
3. Enter the name of your friend and press Enter/Return. You will be presented with search results. If you see your friend, click the orange Connect button. An invitation will be sent to them.
Keep an eye on your Notifications in the lower right corner. A white number will appear if a) someone has sent you a friend request or b) someone has accepted your friend request.
Once your friend request has been accepted, your friend will be added to your list of friends on the home page. You will be able to see if they are logged in and available. If so, you can invite them to an online jam session!
Starting You First Jamkazam Session With A Friend
You and your friend are both logged into Jamkazam. Here’s how to connect and jam!
1. Ensure your audio gear is properly setup.
If needed, you can review your audio setup by clicking the down arrow next to your name in the upper-right and selecting Audio Gear.
After you have verified your audio settings, return to the Jamkazam Home Page.
2. Click the big orange Create Session button. You will see the Start a Session window:
3. Click Quick Start Friends (3rd orange button on the left). You will then see the Session screen:
4. Click the small Invite Musicians link just below Personal Mix. The Invite Musicians popup window will appear:
5. Click Choose Friends and a list of your Jamkazam friends will appear. Select the ones you want to invite by clicking on them. A checkmark will appear next to each selected friend.
6. Once you’ve selected the friends you want to jam with, click Add Selected Friends.
7. Click Invite. You will be returned to the Session window.
8. While you wait for your friend(s) to join, click the Video button. A window will pop up with a live video of yourself.
9. Once your friend joins, their live view will appear, and yours will become a small video image in the corner:
You should now be able to see and hear each other.
10. Note the Audio Settings for your session on the left. You may need to move or minimize the live video window to see this:
Note the first speaker icon to the right of the larger musical note in the circle.
That first icon (the speaker), lets you adjust the gain or volume of your voice. If your voice is too low for the others in the session, click on it, and a vertical slider will appear:
Drag the slider up to increase the volume of your voice for the rest of the people in the Jamkazam session.
11. Sing and jam away!
12. When done, click the Leave button in the top right corner to leave the Jamkazam session.
(MMOTIRT = Making Music Online Together In Real Time)
tl;dr: Step-by-step instructions for launching JamKazam and setting it up for your first jam session
JamKazam looks pretty good, but in actuality is not intuitive, even to an experienced IT person like myself. So in this post I will give step-by-step instructions how to set it up to prepare for your first online jam sessions. Most of the steps are identical on both the Mac and the Windows client. The software may be updated, so the steps listed below may vary from what you experience.
Note: These instructions assume you have a) created a login account with JamKazam b) dowloaded and installed the JamKazam client software (log in and choose Download App from the drop-down menu next to your name in to top right) and c) connected a mic and headphones as well as an Ethernet cable to your computer. If not, review Step 1 – Tech Requirements
1. Launch the JamKazam client. Depending on your setup, you may be prompted for your login and password. If so, enter those and continue. You will be presented with the JamKazam Home Screen:
2. In the upper-right corner, just to the right of your name, click the little down arrow and select Audio Gear. You will be presented with your audio profiles.
3. Click Add New Gear on the bottom left corner. You will be presented with an “Understand Your Gear” window.
4. Click Next. You will be presented with the Select & Test Audio Gear window.
5. Click the Resync button in the lower middle of the screen
6. Under the Audio Input Device, click the down arrow next to Choose… You should see list of possible audio input (microphone) choices. Choose the one you want to use (in this example I am choosing my Plantronics C520-M headset).
7. Under the Audio Output Device column, click the down arrow next to Choose… You will see a list of possible output (speaker/headphone) choices. Choose the one you want to use (in this example I am choosing my Plantronics C520-M headset or “Same as Input”).
After selecting your audio input and output choices, JamKazam will run a latency test and show the results on the rightmost column. In this example, my latency is 13.9ms (yellow). The goal is to get as low a latency value as possible while still maintaining good sound quality. If your Latency value is greater than 20ms, JamKazam will pop up a warning that your computer and network is too slow.
8. Experiment by changing the Frame Size value (bottom of the Audio Output Device column). JamKazam will rerun the latency test whenever you alter a value. In this case, I was able to reduce my latency to 10.9ms.
Speak into your mic or play your instrument and listen to yourself over the headphones. Make sure to note if you hear the sound quality diminish. You want the lowest latency value without sacrificing sound quality.
You can try modifying the Sample Rate. I have found you can lower your latency by changing that value, however, in my experiments so far, the sound quality degrades significantly when alter that value. I also typically get a pop-up warning that my “sample rate settings are currently in conflict.” At this point, I’ve decided to leave the Sample Rate at Match and just change my Frame Size to get the best (lowest) possible latency value.
If you have different headsets and or microphone options, you can plug them in, go back to step 5 above (Resync) and test them out to see which has the lowest latency and best sound quality.
9. Once you are satisfied with your latency value, click Next. You will be presented with the Configure Voice Tracks window. Unless you are going to use multiple tracks (voice, instrument, etc.), simply click Next. You will see the Configure Voice Chat window.
10. Unless you are using multiple microphones (e.g. one for your instrument, one for your voice), simply leave the setting at the default Use Music Microphone and click Next. You will see the Turn Off Direct Monitoring screen.
11. Click the Play button in the middle of the screen. If you hear the little three-note tone repeated, you are fine and can click Next. If you don’t hear anything, you may be using an audio interface and/or having incorrect settings.
12. You should now see the Success! window. Click Close and you will be returned to the Audio Profiles window. The new profile you just created should be listed and “active.” In this example, the first item “In/Out Plantronics C520-M (active)” is my active audio profile.
13. Click Back at the lower right (or the little house icon on the upper right) and you will be returned to the JamKazam home screen.
You are now ready to start a session with a friend!
My next post will be about adding friends and launching your first jam session! Stay tuned!
tl;dr: Initial tests have worked for both Mac and Windows
I am eager to get JamKazam (or any online real-time music collaboration tool) working and document it so others can do the same for themselves. Here are my goals:
Get JamKazam working on and document the process for both macOS and Windows
Successfully play string quartets with my friends online
Successfully stage online performances with remote musicians and remote audience members
Successfully tie JamKazam (or another music collaboration tool) into Google Meet, Zoom, or other video conferencing tool
I had my first brief successful JamKazam session last night! With this post, I have made major headway on Goal #1 above.
Mac to Mac Test #1: Success! I am in Portland, Oregon, and my friend is in Idaho. For our first test, we used this combination:
Test #1
Me
Friend
Computer
MacBook Pro
Desktop Mac
Network Speed (download/upload)
500Mbps/802Mbps
222Mbps/10Mbps
Microphone
Plantronics wired USB Headset
Blue Yeti USB Mic
Headphones
Plantronics wired USB Headset
Headphones plugged into Mac audio jack
Latency
10.9ms (yellow) Sample Rate: Match Frame Size:1
I heard a slight echo in my own voice (like I was in a hallway or bathroom), but it wasn’t disruptive. My friend heard no such echo. We brought up video and were able to see each other with no significant delay between sound and video.
We first tried clapping together. I counted, “1-2-3-4,” and then we started clapping. It was satisfactorily close to unison. I picked up intermittent static when I talked, but my friend heard no such noise.
Mac to Mac Test #2: Success! Since I wanted to try playing a musical instrument, I needed to switch to a different microphone. A headset mic would do fine for singing, but not for acoustic instruments. I own a Yeti Blue USB mic (same as my friend’s), so I plugged it in.
Test #2
Me
Friend
Computer
MacBook Pro
Desktop Mac
Network Speed (download/upload)
473Mbps/802Mbps
222Mbps/10Mbps
Microphone
Blue Yeti USB Mic
Blue Yeti USB Mic
Headphones
Plantronics wired USB Headset
Headphones plugged into Mac audio jack
Latency
9.77ms (green) Sample Rate: Match Frame Size: 1
The first thing I found was that JamKazam does not seem to let you change equipment mid-session, so I ended our jam session, reconfigured JamKazam to use my USB mic, started a new session, invited my friend, and we connected.
Again, sound and video worked fine, although I did still heard some intermittent static when I spoke (which my friend did not hear). It wasn’t terrible or untenable, but it was there. I suspect interference from my numerous electronic gadgets and wireless devices.
I invited my friend to play, so she pulled out her viola, as did I, and we were able to play duets together effortlessly. We started with slower music, so I suggested a faster piece which would have tighter timing demands. Success!
Mac to Windows Test – Success! Update: My first attempt with running JamKazam on Windows last night was a failure, but I just now ran a test and it was a rousing success. Here was my configuration:
Test #3
Me
Friend
Computer
Windows 10 Desktop
Desktop Mac
Network Speed (download/upload)
600Mbps/930Mbps
222Mbps/10Mbps
Microphone
Blue Yeti USB Mic
Blue Yeti USB Mic
Headphones
Headphones plugged into Blue Yeti Mic
Headphones plugged into Mac audio jack
Latency
19ms (yellow)
7.77ms (green)
Not only was my last test running JamKazam on Windows successful, but I experienced none of the static I had last night.
My friend mentioned she experimented plugging her headphones directly into her Mac versus into the jack on her Blue Yeti USB mic. She found she had some static when plugging her headphones into the Mac, but not into the mic.
Testing JamKazam with Google Meet: Fail We returned to the Mac to Mac configuration for my last test, which was to see whether I could share my JamKazam session with Google Meet.
Why do I want to do this? I host regular online karaoke parties using Google Meet. During those parties, only one person can perform while the others all listen while muted. I would love to be able to sing or play duets with a friend and have my Google Meet attendees see and hear us. Also, my understanding is that although you can stage online performances using JamKazam, I believe it requires all audience members to have a JamKazam account. Tying JamKazam into Google Meet (or Zoom, etc.) would skip that requirement.
So we repeated the setup #2 above, and on my Mac I launched Google Meet and had a second person connect into my Google meeting. I shared my desktop and my second friend was able to see my JamKazam video, but they could not hear my friend in Idaho.
I suspect there may be a permissions setting I need to set to allow my Mac computer sound to be shared on Google Meet. I will continue to investigate and test.
In future posts I hope to connect with different people, getting Windows working (done), and give step-by-step instructions for creating a jam session and inviting friends.
In this post I will go over technical requirements to minimize latency, which apply to any online musical collaboration solution, as well as other equipment needed and the first steps to getting set up for JamKazam in particular,
The key to success, and the biggest hurdle to real-time online musical collaboration is minimizing latency. Every step of the way – from you singing or playing a note, the mic picking it up, the sound being converted into electronic form and being transferred into your computer, out your network connection, over the internet to your musical collaborator(s), etc. etc. until they hear it on their end – every step introduces a hesitation, a lag, a latency. For success, we must do everything to reduce and eliminate latency.
1. You must have a wired network connection to your computer
No if, ands, or buts. You cannot use Wi-Fi on your laptop or desktop computer for your internet connection. You could have the fastest internet service (I just upgraded to gigabit, which affords me up to 950Mbps upload and download speeds), but if you use Wi-Fi, an untenable delay will be introduced.
“But my router and computer are in different rooms” That’s okay. Look on the back of your router or modem. You will likely find a row of ports which look like they are for oversized telephone jacks. These are Ethernet ports, and you can run an Ethernet cable from your router or modem to your computer.
Ethernet ports
If there are no unused ports available, see if you can free any up by removing any unused cables or devices. You can also try switching a device to Wi-Fi (e.g. many printers now support Wi-Fi) and removing its Ethernet cable connection.
If you can’t free up a port, you can purchase an inexpensive Hub or Switch, which is rather like a power strip: you plug it into one port on your router or modem, and the hub or switch will offer up several free Ethernet ports to use.
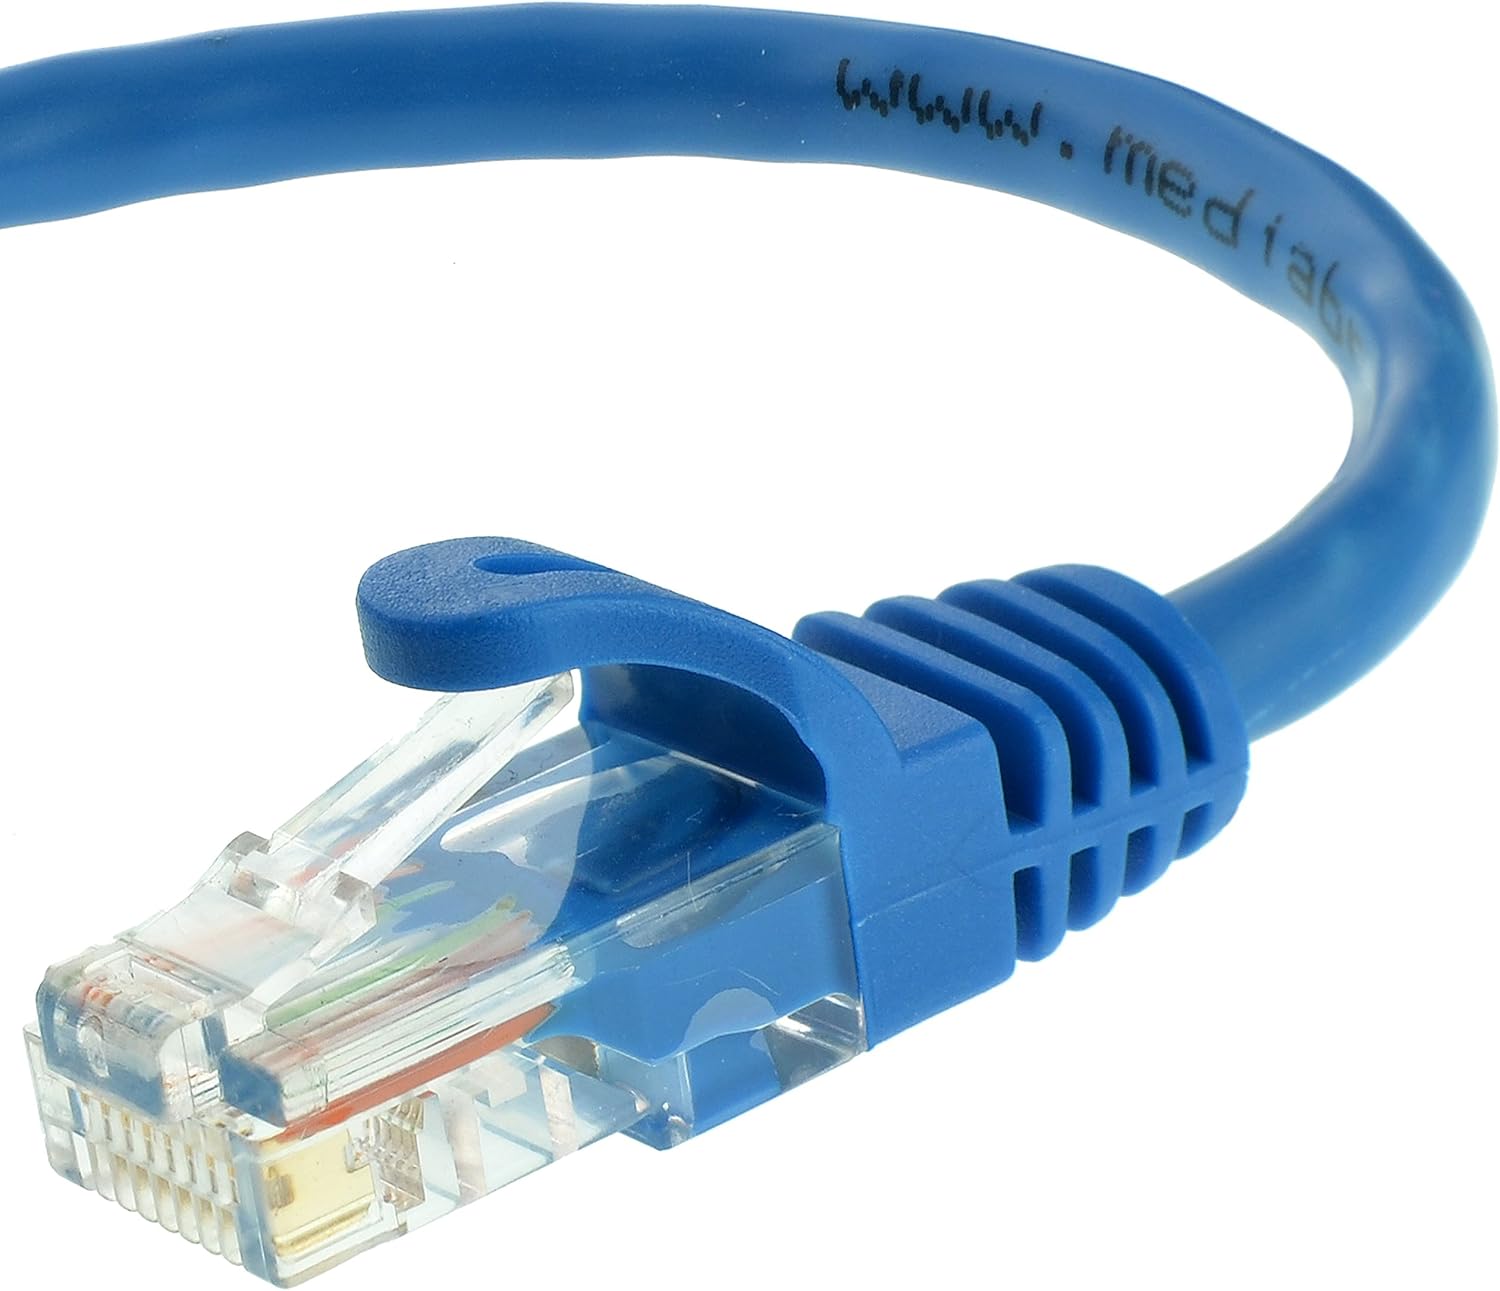
Ethernet cables, sometimes called “Cat5” or “Cat6” cables, can be purchased for mere dollars, and can be 5, 10, 25, 50, or even 100 feet long. Figure out how much length you need (error on the long side). Of course you want to minimize trip hazards and cables getting crimped in doorways.
If you are, or have a friend who is handy, Ethernet cables can be “fished” through walls, under floors, and above ceilings and an Ethernet jack can be installed in your wall in a more convenient location. This permanently avoids having to string a cable under doors and across hallways..
Ethernet cable
Once you connect your Ethernet cable to both your modem/router and your computer, turn off Wi-Fi on your computer to ensure it is not using Wi-Fi and that it is using your Ethernet connection. You can also test your internet speed which may very well be improved.
Both of these sites will run a test for about a minute or so, and then will report your Upload and Download speeds.
Note: Upload and Download speeds do not indicate what your latency is. However, you may see improved overall speeds with a wired Ethernet connection versus one over Wi-Fi. Low latency coupled with fast internet service will improve your online musical collaboration experience.
“My computer doesn’t have an Ethernet port!” Many laptops have no network port into which you can plug an Ethernet cable. My Mac PowerBook has none, but I was able to purchase a “USB C to Ethernet Adapter” for US$15. Check to see what kind of connections your device has first (USB-C, USB-B, etc.).
USB-C to Ethernet adapter
2. Headphones and Earbuds You will need headphones or earbuds to minimize echo and feedback. I recommend wired vs. wireless/Bluetooth, since the latter can add latency. You will want a long cord/extension cord to give you freedom of movement.
3. Microphone If using a laptop, it likely has a built-in mic. You can use that, but the sound quality will be limited. But it may do for your initial testing.
My first tests were with wired USB mics. I tried a wired headset with mic (Plantronics Blackwire C520) and a Blue Yeti USB plugged into my Mac PowerBook. Both worked great.
Plantronics C520 Blackwire Headset
For singing, a headset would be fine. However, if you want to play an an acoustic instrument, a mic that isn’t right in front of your mouth makes better sense. If you are going to play an electric instrument (keyboard, electric guitar, etc.), an audio interface (see below) is likely required.
Yeti Blue USB Mic
If you are using a laptop, you may have a limited number of USB ports, or you may have no standard USB ports (e.g. my Mac PowerBook only has USB-C ports). You may need to use, for example, USB to USB-C adapters US$4-10 or a dock with USB ports.
4. Computer requirements It may vary depending on the musical collaboration software you use, but since I started with JamKazam, https://jamkazam.com/ I’ll list their requirements (although other solutions may support Linux and other operating systems, JamKazam is strictly for Windows or macOS – no Linux, Android, or iOS):
Windows: Window 7, 8, or 10, 64-bit
First-Time Setup – Step 1 – Understand Your Gear – Windows
Unsure which Operating System you have? Right-click the start menu and choose “System” and it should display the version of Windows you have and whether it is 32-bit or 64-bit.
Mac: MacOS 10.8 Mountain Lion or later
First-Time Setup – Step 1 – Understand Your Gear – Mac
Unsure what MacOS you have? Click the Apple icon in the top left and choose “About this Mac.” The top line indicates the name of the OS (e.g. “macOS Catalina”) and the second line the version.
5. Sound Interface (optional) If you view JamKazam setup videos (above and elsewhere), you will see many references to “audio interfaces.” I don’t own one, but may end up purchasing one at some point. They can be less than US$100 but can be much more depending on the features and number of inputs. If you go that direction, I recommend you do your research and buy one with a USB interface.
Unless you want to play an electric instrument (keyboard, guitar, etc.) you don’t likely need one to get started.
JamKazam Account To use JamKazam, you must create an account. It’s free. Just follow the steps at: https://www.jamkazam.com/signup
A free account will give you up to a 1-hour long session, and 4 total hours per month. During your first month, you are given “Gold” level service which has no time restrictions, supports higher-level sound quality, and offers email support. Here’s a comparison of their various plans.
tl;dr: Singing and playing duets and larger ensembles in real-time over the internet is possible. It’s not intuitive, but it’s simpler than you think!
I ache to sing and play together with others – that is one of my greatest sources of joy. Since all concerts and gigs have been cancelled, I have hosted a couple outdoor, distanced, masked “driveway concerts,” performing string quartets and string quintets with friends. But winter weather and darkness have made that impossible.
Screenshot from one of many online karaoke parties I’ve hosted
What we haven’t been able to do, however, is to sing duets or trios with distant friends. Singing or playing over the internet usually introduces a time lag (aka “latency”) of .25-1 second, which is untenable. Up to this point, only those who are sheltering together during the pandemic have the option of singing/playing together.
I was aware there is technology out there that minimizes latency over the net and enables people to perform together (e.g. JamKazam, Jamulus, JackTrip, etc.). But even as an experienced IT professional, my earlier investigations into JamKazam and Jamulus were unsuccessful and frustrating. I found the software unintuitive and glitchy, the help documentation seriously lacking, and I just couldn’t get them to work.
Last night I had my first successful test with JamKazam. I am in Portland, OR, and I was able to play duets with a friend in Moscow, ID. Sound was passable, and we had live video so we could see each other. We were both so excited!
I know many musicians, singers, and teachers who would benefit from being able to perform in real-time with friends, colleagues, and students over the net. I will document my journey and recommendations. My goal is to make this understandable and within reach for the non-techie person.
This week, when millions around the world celebrate holidays with the words, “Peace on Earth,” may we remember those who live without peace and security. There are sadly too many in my own country and beyond who live without peace, security, or justice.
I just learned for the first time about the largest non-self-governing territory listed by the UN and its terrible oppressive occupation. I knew nothing about this region – home to over a half million people – and suspect the majority of my readers are similarly unaware. It is separated by the second longest border wall on Earth (over 1700 miles) and the longest minefield (containing an estimated 7 million land mines).
A steady succession of U.S. presidents, both Republican and Democratic, have supported the occupation of and U.S. military contracts in this region.
Where is this? It is the last colony in Africa: Western Sahara.
Flag of Western Sahara – simply holding this flag in public can get an activist beaten and arrested
Spain established control of Western Sahara as a colony in 1884. Spain finally, slowly decolonized Western Sahara in 1975, signing an agreement with Western Saraha’s neighbors, Morocco and Mauritania.
The U.S. has meddled in and profited from the occupation of Western Sahara for decades:
In 1975, Secretary of State Henry Kissinger privately told President Gerald Ford he hoped for a “rigged UN vote” at the Security Council to confirm Morocco’s claim over Western Sahara.
In 1979, Carter’s State Department gave $200 million to the U.S. company Northrop Page Communications to build an “intrusion detection system” for the nearly 1,700-mile wall Morocco built in Western Sahara, which is lined with an estimated 7 million land mines. A year later, Carter provided Morocco with $230 million in military aid.
in 2017, Trump’s disgraced EPA administrator Scott Pruitt took a controversial $100,000 trip to Morocco in December of 2017, where he met with the head of Morocco’s state-owned mining company.
I say that our damnation comes from the natural resources we have here. If it wasn’t for these natural resources, Morocco never would have invaded Western Sahara.
The Moroccan Wall, 2nd longest border wall and largest minefield on Earth
In this time of reflection, and the holiest of holidays for over a third of the world’s population, remember those who suffer under oppression, occupation, and brutality.
tl;dr: When upgrading your internet service, ask many questions, do your homework, have a backup plan, and expect additional challenges and potential costs
I’m an experienced IT professional, so many of the steps I took are beyond what others may know or understand. I’ll try to keep this as clear as I can for the non-IT person.
It used to be that internet service was used only for email and web surfing (and even before the web: anyone remember Gopher, Archie, or Veronica?). Older folks may reminisce about modems screeching and whining and tying up the telephone line for hours. I can remember watching text appear on the screen, almost like someone was typing on the other side of the monitor’s surface. I could read the text faster that it took the modem and computer terminal to serve it up.
Okay, I never used an acoustic coupler modem like this, but I saw one, and once saw a 300 baud modem in use
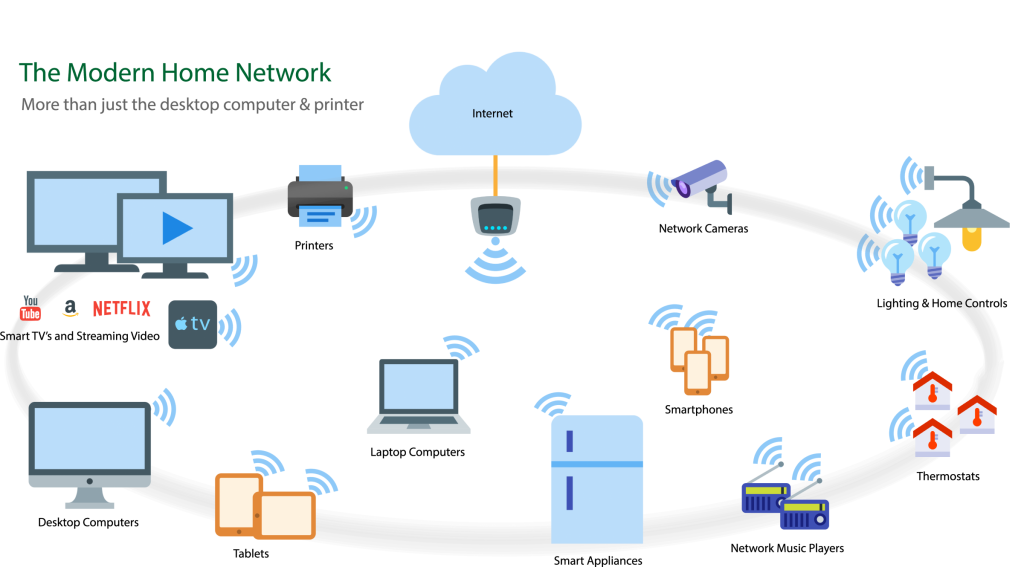
Nowadays, internet service is used by so many more devices and services in your home. Many people have cut the cord and switched their television viewing to streaming services like Netflix, Hulu, and many others. If your cell phone has bad coverage inside your home, you might use Wi-Fi on your phone when at home. Many computer printers use Wi-Fi and can be placed anywhere, even in a closet, unrestricted by the tether of a heavy cable. Home security systems and cameras, your children’s laptop or tablet computer, video chats with family and friends, your home voice assistant/question answerer (Alexa, Siri, Google), your video doorbell (Ring), your gaming consoles, even your thermostat, outlets, and other so-called “smart” devices or “E-” or “I-” devices may all be dependent upon Wi-Fi and internet service.
You may not have a “smart home,” but you probably have at least 3 or many more connected devices
With the pandemic, there are added demands on your internet service. Distance learning, remote work, and the increased reliance on video chatting to stay in touch with friends and loved ones have added to the burden placed on your internet “pipe.”
So, I decided to upgrade my internet connection speed.
What follows is a long, hopefully instructive and cautionary tale.
We had a 25m/25m connection (25Mbps upload/25Mbps download) connection, which was sufficient for most our needs. I work remotely and attend numerous video conference calls. Sometimes when I move large files (backups, downloads), it impacts streaming TV in another room (loss of picture quality, network hiccups, etc.). I write and edit several blogs and administer a retail website. I also am doing more video work, both live and recorded, and those files can be huge and data transfers time consuming.
Doing a little research, I learned my internet provider could upgrade me to 100m/100m with little to no increase in monthly fees for a year. It seemed like a no-brainer. I called them up and ordered the upgrade. They said a technician would come the following day between 8am and noon to do the necessary work. I was delighted that we could get upgraded service so quickly!
Mistake #1: I did not ask whether my internet service would go down before the service call
Mistake #2: I should not have scheduled my upgrade during a time that would impact my work
The customer service person never indicated that I might lose internet service before my scheduled service call. The evening before our scheduled appointment, our internet quit working around 10:30pm. No TV. The house was strangely silent.
I called tech support and was told that programming changes on their end to support 100m/100m had likely been made, and since my old network hardware was incompatible and needed to be replaced, that was the cause for the outage. I asked if our service could be returned to 25m/25m so I could do my work early in the morning and was told, yes, but it would take a while. I went to sleep.
At 5:00am, our internet was still down, so I called tech support. Yes, our service wouldn’t work, and, what’s worse, for some reason our scheduled technician visit for that morning had been canceled! The next available appointment wouldn’t be for another two days! Exasperated, I asked to get that new appointment locked down, but insisted I needed to be restored back to 25m/25m in the meantime. The technician agreed, and after at least an hour on hold, they made the changes.
On my end, I disconnected all my network equipment (router, bridge, wireless AP, etc.) and connected a PC directly to the internet port (what for most people would be the equivalent of the modem). The PC connected. I thanked the technician and hung up.
I then tried adding the first network device between the modem port and the PC: my router. No dice. I plugged the PC back directly into the modem. No internet.
I called tech support back, and after about 30-45 minutes, was able to get internet restored for my PC. We hung up, and I plugged my router in. No internet. Plugged my PC back in, no internet.
I went thru this cycle of calling the provider, getting service, hanging up, losing service at least 2-3 times. Each time on the phone took at least 30-60 minutes. And there were several phone calls where I was dropped and had to call and start all over again.
Through these calls I learned a little bit more about the network devices on the provider’s side (Optical Network Terminal or “ONT”, its power supply and battery backup). I learned how to power cycle my ONT, and doing so, was able to restore my own internet service. Through testing, I found the internet service would last about 5 minutes, then drop. That is why, I assumed, I could never get anything other than my PC to work; by the time I’d connect anything else, my internet service had ceased.
So I called tech support back to report this new information. They were perplexed and said the issue was likely my ONT, and only a service technician’s visit would fix it. My appointment was still two days away. Two days without being able to work remotely. Two days without any streaming TV. Two days with barely a single bar of signal strength for my cell phone at home. They promised to escalate the service request in case a technician might get an opening to help me. By now it was midday and I’d spent 7 hours wrangling with this issue.
During our wait, we decided to go ahead and upgrade to gigabit, which is approximately 1000Mbps. If we were going to go through this much pain to upgrade, why not go for gigabit. A call to customer service assured us that we only needed to tell our technician we wanted gigabit, and they would be able to install that for us on the spot.
Amazingly, I received a call from a technician just an hour or so later saying he was available and could swing by within minutes.
The technician was great. He spent about 4 hours replacing equipment on the outside of the house and inside and testing everything. He was courteous, professional, and answered all my questions.
My old Optical Network Terminal (ONT)
My new gigabit ONT
At the end of his labors, we connected my PC, and instantly I was seeing data transfer speeds over 900Mbps. And my internet didn’t drop after 5 minutes. The technician gave me his card with phone number, wished me well, and departed.
The technician’s work was done, but mine was only beginning. I needed to get my whole home network back up and running: router, switch, Wi-Fi and all the Wi-Fi devices.
I plugged my router in…and no internet. I plugged my switch in and it worked, although I could not get my Wi-Fi AP (Access point) to work. But I really needed a router to work to provide the security needed at the first point in my network connection.
Although my router and wireless access point are both on the higher-end, they were both a few years old, and after an hour futzing with them without success, I decided to buy a new Wi-Fi router.
Many people use a router supplied by their internet provider. On one hand, you get the benefit of having something your internet provider supports and troubleshoots for you. On the other hand, it will likely not be the most up-to-date feature- and performance-wise. Also, you are usually charged a monthly rental fee. $5 or so a month may not seem like much (and a bargain if you think your provider offers decent tech support), but if you do your research and purchase your own modem, you may save money in the long run and enjoy better performance and security – but you have to know what you are doing and/or have someone you can call on to help you if you need it.
A short Costco buying spree later, I plugged in the new router and followed all the steps…and no internet. Argh!
I called tech support with my internet provider, and was placed on hold for a 2nd level technician. As the minutes ticked by, I dived deep into the new router’s settings. I upgraded the Firmware (something everyone should do with their router on a regular basis; here’s why). I kept plugging the PC directly into the modem (success) and then the router (failure). Then I stumbled on an unexpected setting in my router:
My router has a Router MAC Address setting. It allows you to use the MAC address of the router (default), or use the MAC address of the computer.
Since my internet worked fine with my computer and neither my old nor new router would not, I suspected the MAC address. Perhaps my internet provider had some sort of connection, expectation, or restriction to my PC’s specific MAC address. So I tried that setting. Voila! Everything started working!
I continued to remain on hold with tech support. I wanted to see if I could remove that restriction as it might cause problems in the future. While waiting on hold I connected my switch, configured Wi-Fi on the router, then went around the house bringing Wi-Fi devices online (TVs using Roku sticks, wireless printers, laptops, cell phones, tablets…). I got everything back online and tested. I completed this in about 40 minutes, and I never got a tech support person. I hung up.
My wired computers are now consistently getting between 600-950Mbps speeds (a 40x increase in speed). My wireless devices are getting 60-250Mbps depending on which wireless protocol I use and how far they are from the Wi-Fi router (a 3-20x increase in speed).
Lessons Learned:
If you are upgrading your internet service, expect and plan for outages. Ask your provider directly what you should expect, but have a backup plan. You want to minimize disruptions to your work, your child’s distance learning, your streaming services, etc. if possible. Have a backup plan in case the upgrade takes hours or days longer than expected.
Make a list of every networked item in your house. Make sure you have documentation on them all, especially how to connect them to Wi-Fi (printers, smart devices, security cameras, etc.). If needed, download and print the documentation for your router, switch, and all Wi-Fi devices, etc. before you upgrade.
Test logging into your router, Wi-Fi settings, etc. before you upgrade. Make sure you have all your logins and passwords printed out.
Upgrade the firmware on your router.
Ask specific questions about costs: will the technician visit, the hardware upgrade, etc. cost you anything? What will the monthly fee be afterwards? Is that a promotional fee that increases after 3/6/12 months?
Ask if you will be charged anything if the new equipment fails and needs to be serviced or replaced.
If any of your network equipment is old, you may need to upgrade it to get the best performance. For example, since I was upgrading to gigabit, I needed to make sure my router and switch supported gigabit speeds. In my case, my switch maxed out at 100Mbps.